
QuickBooks Portable File – Restoring QuickBooks Loan Manager
Continuing coverage of the QuickBooks Portable File restoration process within QuickBooks Desktop, recovering what doesn’t come in when it’s restored, we look at restoring your QuickBooks Loan Manager data. This, among the other items to restore, is likely the least rigorous.
What is QuickBooks Loan Manager?
QuickBooks Loan Manager doesn’t contain any loans within QuickBooks Desktop, yet.
As the name suggests, it lets QuickBooks Desktop keep track of any loan you want to have tracked inside it. Setting this up does require attention to the details of a specific loan you want to track. It also requires proper calibration of your accounts, and institutions laid out within QuickBooks; the Loan Manager setup wizard reinforces this when you add loans.
1. The Prerequisites To Track Your Loans in QuickBooks Desktop
Make sure your account tracking your loan and the vendor you’re making payments to are in your company file. Otherwise, as shown, you will be left with incorrect or empty dropdowns.
In this example: the account available in the “Account Name” dropdown displays only one available account Loan Manager can use, yet it’s still inapplicable because of it being designated for Payroll. To satisfy Loan Manager’s needs, you need to set up a liability account within your QuickBooks Desktop Chart of Accounts. Keeping the depicted example, the “Lender” Navient often implies then need to have a long-term liability account – because of the loan lasting more than a year. For a more detailed listing of accounting definitions, here’s a handy dictionary you can refer to.
If you don’t see your needed “Lender,” you can create it within QuickBooks Desktop’s Vendor Center. “Origination Date,” Original Amount,” and “Term” naturally correspond to the details surrounding a loan you want to track.
2. Other Prerequisites – Tracking Loan Payments
Details for this process require, again, attention to the parameters of a given loan. Clicking “Next” will take you to final step
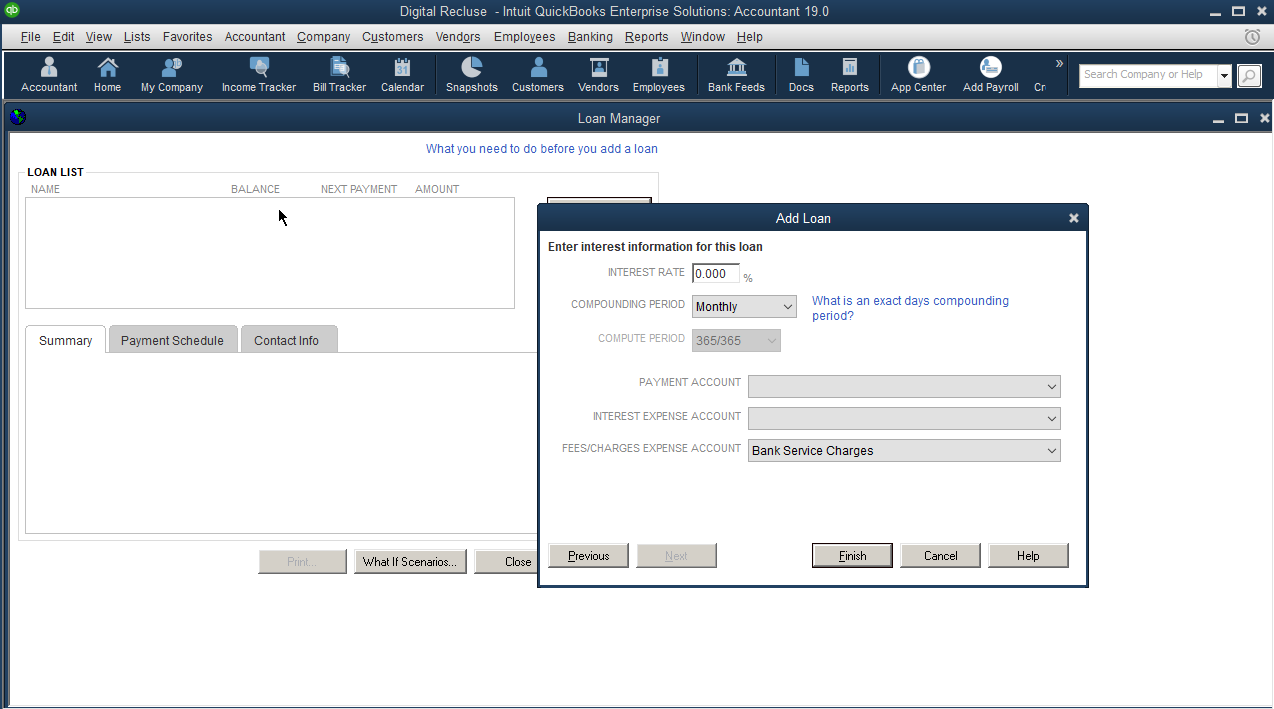
The last prerequisites include the properly set payment or bank account, interest expense account, and fee or charge expense account. Hitting “Finish” finalizes the inclusion of your loan in Loan Manager.
If you end up having to add requisite items mentioned, you will have to “Cancel” out of Loan Manager completely. Once this is done, just relaunch Loan Manager then click “Add Loan.” You should see the added items as available dropdown items. As depicted, creating a loan can be tedious; it’s even more so if you have to add more than a few loans you want to track. For a more detailed rundown of setting up loans in QuickBooks Loan Manager, Intuit’s article glosses through every facet involved thoroughly to help you properly track loans. Given the care needed, and time taken to properly set up Loan Manager, backing up your Loan Manager File becomes more important.
How Do I Restore Loan Manager Data After Restoring a QuickBooks Desktop Portable File?
After restoring a QuickBooks Portable File, Loan Manager data won’t be available.
1. Locate Your QuickBooks Loan Manager File
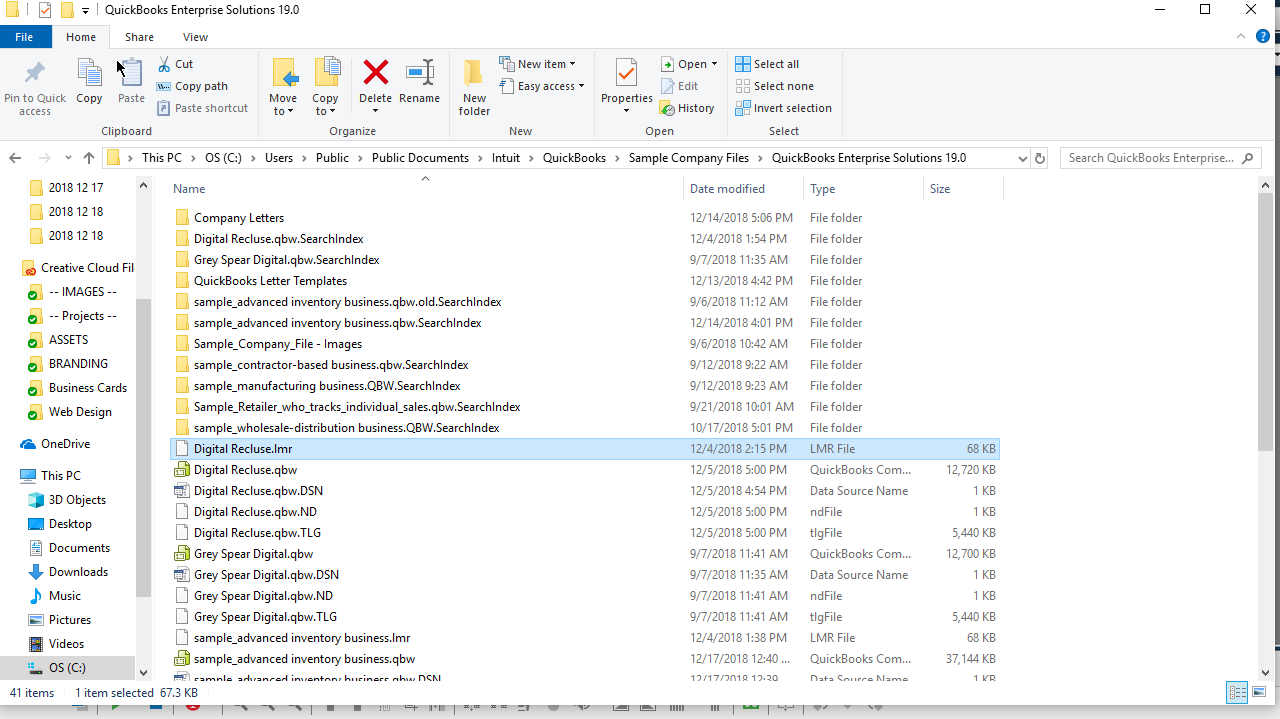
Loan Manager data is stored in a single file, that being the LMR file type. It will be placed alongside your QuickBooks Company File – wherever it’s stored. It also is given the same name as your company file name.
Depending on your level of vigilance, you will want to back this up regularly. Given its typically small size, you can simply email it to yourself or save it on a small flash drive. You just want to make sure your QuickBooks company file and Loan Manager file are up to date: Loan Manager will need to have the requisite pieces (as previously discussed) in your company file, while the Loan Manager file simply needs the current loans you entered for tracking.
2. Copy and Paste Your Loan Manager File (.LMR) into a Chosen Location
Backing up the file is the first step in restoring Loan Manager data.
3. Copy and Paste Your Backup Loan Manager File into the Folder Storing Your QuickBooks Company File
Just drop your Loan Manager file into your company file folder.
As seen, be mindful of inexplicable overwrites. To avoid this, simply rename the existing Loan Manager file (which is created when Loan Manager is launched) differently from your company file name – before pasting your backup file into the company file folder. After that’s done, you can open your file and launch Loan Manager after. From this, your data should now show up.
Setting up loan tracking in QuickBooks Desktop can end up time-consuming, especially when you have a little more than a handful of loans to track. Spending time to set them up again is a likely pain point; backing up and restoring your loan data is painless, however – as previously illustrated.
The Next Phase in QuickBooks Desktop Portable File Restoration
QuickBooks Fixed Asset Manager Data
We explore recovering your fixed assets in QuickBooks Desktop, after restoring a Portable File. This is process is a little more involved than loans and letters, because of certain details surrounding how Fixed Asset Manager handles client data – especially during backup and restoration. In the meantime, if you have additional questions about Loan Manager or tracking loans in QuickBooks, call us! Also, don’t hesitate to schedule your review and consultation surrounding your overall QuickBooks Company File and financial data.